
Pure Data Installation Instructions
Step-by-step guide for installing the FluCoMa package for Pure Data
FluCoMa will only work with the 64-bit version of Pure Data.
The FluCoMa package is now available through deken, PureData’s native Package Manager. This insures the latest public version of the package is installed, and therefore this is the recommended approach. The instructions below are for a manual installation.
Step 1: Download the Pure Data Package
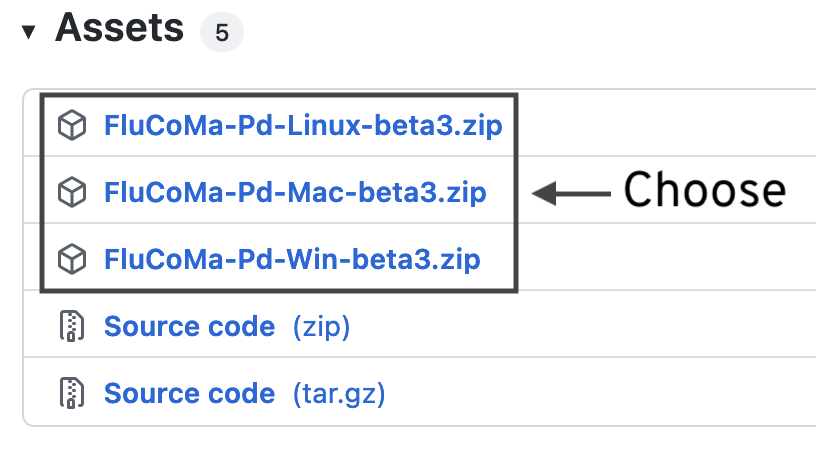
Download the latest version of the Pure Data package from GitHub releases. Choose the appropriate release for your operating system.
https://github.com/flucoma/flucoma-pd/releases/latest
This FluCoMa package can be put next to the “externals” folder (which is usually found in the “Pd” folder inside your “Documents” folder)
Step 2: Add the Package to the Search Path
To install this package you need to add its path to Pure Data’s search paths. To achieve this:
Open Pure Data’s “Path…” preferences from the Pure Data preferences menu.
Click “New…”, and navigating to the folder “FluidCorpusManipulation” that was just downloaded.
Click “Choose” when the folder itself highlighted, not something in the “FluidCorpusManipulation” folder.
Nota Bene
You must complete this step to add the “FluidCorpusManipulation” folder to the Pure Data search paths. It is not sufficient to just place the “FluidCorpusManipulation” folder inside Pure Data’s “extensions” folder.
Step 3: Add the FluCoMa library to the Startup Preferences
We also need to add the FluCoMa library to the startup libraries of Pure Data. This is because many of our objects live inside a single compiled object called fluid_libmanipulation.
To add the fluid_libmanipulation library to the startup preferences:
- Open Pure Data’s “Startup…” preferences from the Pure Data preferences menu.

Click
New...Type
fluid_libmanipulation
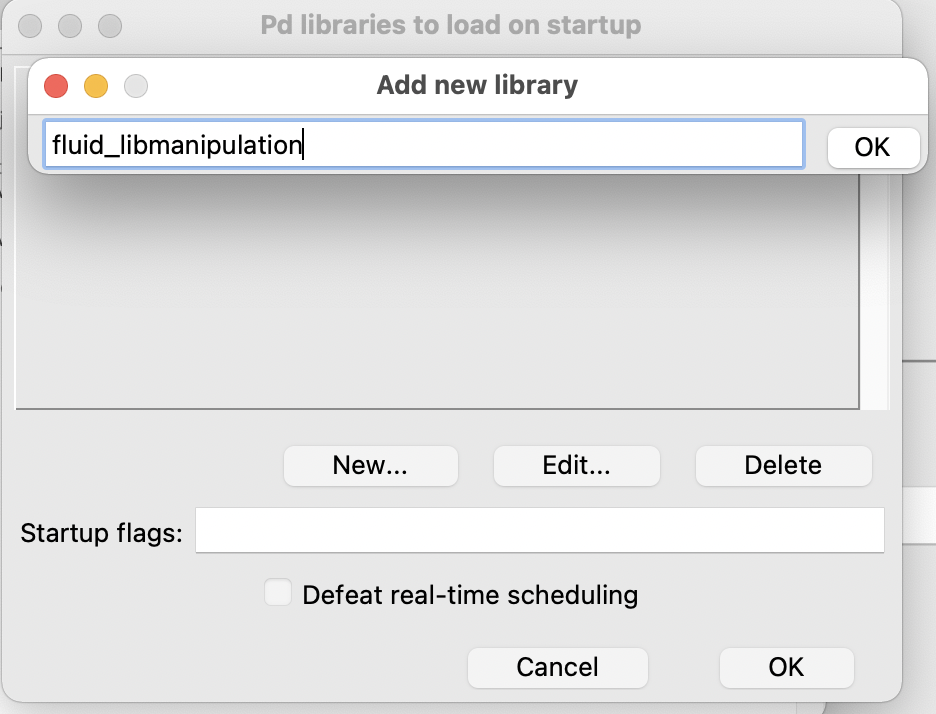
- Click OK
Step 4: Run and Test
Now check that the installation worked.
Restart Pure Data.
Open this patch.